Intermission time from this house hunting and buying! Let's talk about a small project I did recently for my guest bedroom.
I'd been looking for a dresser to put in my guest bedroom, but didn't want to spend much money. I'm going for a yellow/grey color combo in that room... so I was just browsing on craigslist... then came across this guy.

I paid $30 (+$5 delivery fee) for this Maple Beauty and a mirror. It had some water rings cups, some stains, some dings... but nevertheless, for a solid piece of furniture, $30 was a steal.
I got my screwdriver, took all the cabinet pulls off. I got my paint/polyurethane stripper out and got to work with it. After I got the majority of it off, I got my orbit sander and 80 grit sander and went to work to get all the varnish off.
I used two colors, a pale yellow from Valspar and Stowe White from Glidden, that I already had in my garage.
Then I bought this guy with my 40% off Michael's coupon. The Martha Stewart Stencils and the Martha Stewart Stencil brushes.


I gave the dresser two coats. I painted the top of the dresser and the drawers white, then I went painted the main dresser front and sides the yellow.
Problem was, the Stowe white was an oil based color... and the little tubes of acrylic paint that you can buy at Michael's for $2 will NOT work for stenciling on top of oil based paint. That's why I went ahead and used the Valspar Latex.
I did a test run of stenciling by taping the stencil down and blotting it lightly........ but it failed. The paint would bleed through and I couldn't get any clean lines. Frustrated, I went to Google. Google tells me to use adhesive on the stencil. Hey! I own this guy:
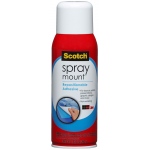
So I sprayed my stencil from about 16 inches far, let it dry slightly, then I used the plastic lining that the Stencils came in to lay the stencil adhesive-side down to get rid of the initial tackiness to tone down the adhesive strength. After a few times, the adhesive was tacky enough that it'll stick down to my cabinet, but not tacky enough that it'll leave glue adhesive residue when I peel.
I dipped my brush in, literally getting a coat at the tip of the brush, then used an ad paper that was slightly stronger than regular paper to turn my brush on to let off an any excess paint.

Then I blotted the stencil, making sure I got every spot, then peeled off the stencil carefullly.
Outcome:
 |
| I need a better camera.... |


I'm excited to buy new accessories for the dresser and put in my guest room!
No comments:
Post a Comment